Wednesday, October 31, 2012

Book Review - Cuddle Me Quick by Christine Porter and Darra Williamson

Hi everyone:

Recently I've found myself looking at books on baby quilts. No, there is no new addition coming into our family, but one of my best quilting buds has a new grandbaby, so maybe that's why. In any case, these are the type of quilt books that I'm been looking at lately. 
Photo courtesy of That Patchwork Place/Martingale

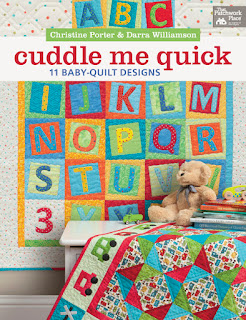
Martingale recently released a book full of cute baby quilts by Christine Porter and Darra Williamson. Cuddle Me Quick has 11 baby-size projects in it, combining both pieced and appliqué blankies. In addition to the cuddly patterns, Christine and Darra give you lots of helpful information for constructing and completing the projects, with many project specific tips. 


Comin' Down the Tracks from Cuddle Me Quick
Photo courtesy of That Patchwork Place/Martingale
One of the many things that I liked about the book, in addition to the projects themselves, was that information was given about how to quilt each project. Close-up photos of each quilt were given with a description as to the quilting motif, as well as the thread and thread colour used. I've never been a fan of "quilt as desired", so I appreciated this extra content. Since baby quilts are a good project for a new quilter, who may not have much experience choosing a quilting design, providing that information is very helpful. 
Rubber Duckies from Cuddle Me Quick
Photo courtesy of That Patchwork Place/Martingale
The designs themselves are simple enough for most beginner quilters, with some being a bit more advanced. Again, great projects for a novice quilter. These are also quilts that I could see actually being used and washed and used again. Some patterns for baby quilts seem more of the heirloom variety and I couldn't imagine using them, especially knowing how often they'll be washed. Not so with these designs: they're just the type of quilt that you'd want to wrap around a little one, and cuddle him/her up. 
It Takes a Village from Cuddle Me Quick
Photo courtesy of That Patchwork Place/Martingale
These quilts are not just for babies either. Again, some patterns are too baby-ish and would be outgrown by the time a child is 4 or 5. These quilts will grow with the child and are large enough to wrap around an older child. Most of the patterns would be suitable for both boys and girls, with a few being more specifically for either a girl or boy.

If you're looking for a great book with lots of patterns for babies and toddlers, I would definitely add this to your library. 

Wednesday, October 24, 2012

Book review - Simple Charm by Kim Diehl

Hi everyone:

I've been cocooning more with the cooler weather. You know, staying at home and reading my quilting books in front of the fireplace with a cup of tea. In your dreams! It's more like rush off to work, get home, eat and then try to work on as many pattern designs as I can before the kids arrive home. Somewhere in between, usually while I'm grabbing a bit to eat, I have the opportunity to review some of the books that I've recently purchased or that I've received as review copies (thank you, Martingale!). I recently received one of Kim Diehl's books, Simple Charm - 12 Scrappy Patchwork and Appliqué Quilt Patterns. 
Photo courtesy of Martingale
Okay, first let me say that this review will be a bit prejudiced as I love all of Kim's designs (and we share the same name, how great is that?!). I have all of her books and have even made some of her patterns. If you know me, you'll know how rare it is that I actually make a pattern from a book as the project I'm working on is usually a new pattern design for Chatterbox Quilts. I don't know if it's the combination of her fabric or the designs themselves, but Kim's books always appeal to me (or it could be that same name thing again).
Four and Twenty Blackbirds from Simple Charm by Kim Diehl
Photo courtesy of Martingale
In this book, Kim uses scrap fabrics in her designs, using what I would call a controlled approach. The fabric in her scrappy quilts all blend together very well due to her recognition that "regardless of their specific hue, there are basically two categories that colors fall into: clear and bright, or muted and muddy. Making this distinction as you consider your fabric selections will make it possible for you to blend nearly any prints together into a single quilt..." This makes sense: just choose clear, bright colors and they'll work together or choose muted shades, but don't mix the two fabric types together. Maybe I'll  have to start sorting my scraps into bright, clear fabrics and muted, muddy tones and then I can just choose from the appropriate pile when making scrap quilts. Learned something new already. But back to the book...
Short and Sweet from Simple Charm by Kim Diehl
Photo courtesy of Martingale
The projects in this book are mostly large wall hangings with a few smaller and larger projects. I would call Kim's designs traditional, but she uses a more modern fabric palette to give her patterns a unique look. The designs are simple, yet elegant, with the appliqués evoking a contemporary primitive look. These projects work very well with scraps and Kim even uses these in her binding and in a small pillow project. 
Gathering Garden from Simple Charm by Kim Diehl
Photo courtesy of Martingale
In addition to the wonderful patterns, Kim includes detailed information on assembling the quilt top and creating the appliqués in cotton and in wool. Kim likes to use invisible machine appliqué in her books and includes instructions on how to do this technique. Kim's "Pin Points" offer extra information to help you achieve success in creating her designs. I especially enjoy the fact that she includes information on finishing the quilt top, from quilting suggestions to binding information. 
Snow in Summer from Simple Charm by Kim Diehl
Photo courtesy of Martingale
If you enjoyed Kim's previous books, you will definitely want to add Simple Charm to your collection.

Monday, October 22, 2012

Book Review - At Home with Country Quilts

Hi everyone:

With the cooler weather and snow, it finally seems like fall to me - maybe even winter! At this time of year the books that catch my eye have "fall-like" fabrics in them and country style designs. 
Photo courtesy of Martingale
Recently I was perusing At Home with Country Quilts - 13 Patchwork Patterns by Cheryl Wall. This is Cheryl's second book with Martingale and since I enjoyed her first book, Country Comforts, I was sure that I would like her latest publication as well.

The back cover of the book describes At Home with Country Quilts as follows:

  • "Enjoy a new collection of cozy quilts in the primitive country style that made Country Comforts so popular
  • Create 13 homey patchwork quilts in a variety of sizes; many are accented with charming appliqué details
  • Learn piecing methods as well as simple techniques for cotton and wool appliqué"
Cheryl has a "relaxed, casual approach to quilting", and I find her patterns easy to do with simple shapes that have maximum impact. Her quilts have a traditional look with a pop of  modern elements added to them. For example, she uses such traditional blocks as Nine Patch and Shoofly, but adds appliqué or a different setting to give them contemporary appeal. 
Night Blooms from At Home with Country Quilts by Cheryl Wall
Photo courtesy of Martingale
Her Scrappy Squares design would definitely fit into the modern quilt craze if you changed the fabrics to solids instead of the country prints she has used.
Scrappy Squares from At Home with Country Quilts by Cheryl Wall
Photo courtesy of Martingale
Cheryl includes information on fabric selection and the use of wool in the appliqués, as well as general instructions on finishing the projects. 
Sunflower Explosion from At Home with Country Quilts by Cheryl Wall
Photo courtesy of Martingale
The patterns in this book range from large wall hanging or table topper size to bed size quilts. Cheryl uses fusible web appliqué for her appliqués and embellishes many of her designs with hand embroidery details (my favourite thing to do!). 

I enjoyed the simple, but effective, designs in this book and the country look of the projects which create a homey feel. If you like easy appliqué with a country twist, you'll appreciate this book.

Thursday, October 18, 2012

Why I'm Not Designing Quilt Patterns

Hi everyone:


Okay, before you get concerned, let me explain: today, I'm not designing any quilt patterns because I'm working on another type of project. Does it involve fabric? Yes, it does. Is it an appliqué type thing? Yes, it is. So, what is it? It's an appliqué template.

Now that the mystery is over, I'm sure you're wondering what an appliqué template is. It's a fusible web appliqué design that is fused together and can then be added to various projects. In my pattern store on Craftsy I have several different designs to choose from.
Manga Owlet appliqué template designed by Jamie Hirst
Frog Face appliqué template

Each design has several individual pieces in it: you fuse the design together and then apply it to different items. Fuse it to a square of background fabric, add a bit of hand embroidery, pop it into an embroidery hoop and you have wall art. Fuse it to a fabric shopping bag and you're set to hit the grocery aisles. Have a little one in the house? These are perfect to add to onesies or t-shirts - just make sure you finish the edges with a satin stitch to ensure that the appliqué will stay attached through multiple washings.

Recently I've been working on a new design that I'll be adding to the pattern store soon. Here's a sneak peek.
Still tweaking the instructions a bit

Templates traced, fused and ready to be cut out and assembled
My appliqué templates are designed for fusible web appliqué and include an appliqué placement guide, as well as individual appliqué templates, already reversed for you.

I've given you some ideas as to how you could use these templates. What other ideas do you have for using these appliqué templates?

Monday, October 15, 2012

Stuffies and quilts and websites, oh my!

Hi everyone:

This past week was very busy for me. First, I had two sick kids in the house - with different ailments. This always throws off my schedule, even though they are now old enough to pretty much look after themselves. It means calling schools in the morning to let them know that my child won't be there and making sure they're hydrated and medicated. At least they are quieter when they're not feeling well, so I  did manage to accomplish quite a bit this past week.

I finished up Teeka's mat. I had some leftover charm squares and thought that they would look lovely as a sleep mat for her - and would give me a small project to practise my free motion skills on. It's almost too pretty for a cat mat, but if anyone deserves it, it is Teeka.
Teeka trying out her new mat
Is this for me?
 I backed it in flannel and she appears to really like it. 

I love it! Notice the flower echo free-motion quilting.
Next I had to whip up a stuffy for Jamie to take to leadership camp - which he didn't go to as he had the stomach flu. In any case, he has a new stuffy to add to his collection. I drew up a pattern on freezer paper, ironed it to a recycled sweater (nice and soft merino wool), cut it out, stitched it up and stuffed it. 
Another stuffy for the collection
I then had to add a bit more to it, so chose some buttons from my collection for his eyes. I think they turned out well. I was pleased that I found a project that begged to be made from one of the many wool sweaters that I have stashed away for just such a design. I was also glad that I could use up some of my buttons and I think they made quite good buggy eyes.
I've got my eye(s) on you!
When I wasn't working on these projects, I was working on cleaning up files for our new website. It's still a glimmer in the distance, but getting brighter every day. This week-end I managed to create a collage of my patterns for the front page and I think it turned out rather well. Patterns are already loaded up into the website store, now it's just a matter of adding text to various pages and then to test it out. Keep your fingers crossed that everything syncs together well. If you work with Rapidweaver, let me know as I might need to ask for some help in the future.

This week I hope to work on some more patterns and do some actual quilting. I have several fall/Halloween projects that are already waiting for me at the sewing machine. 

I hope you have a productive week and are enjoying fall.

Friday, October 12, 2012

Book Review - Easy and Fun Free-Motion Quilting

Hi everyone:

I've recently been spending time working on my free-motion quilting skills - of which I have few. No, really, when I say that I'm not good at free-motion quilting on a domestic sewing machine, I actually mean it. I can see the quilting motif in my head and I can feel it when I move the fabric, but when I look at the result - well, let's just say that it's a good thing that I quilt with wine close at hand. Part of the problem may be that I've never really worked on quilting my projects on my domestic machine. I would do them on my mid-arm machine. Now that I no longer have my mid-arm machine, I've been forced to quilt on my sewing machine. But that's okay because it was a skill that I definitely needed to work on and master. I have seen an improvement in the consistency of my stitch length and I don't feel as intimidated to quilt as I did at first, but I'm still at the "working on" stage. 
Photo courtesy of Martingale
In my quest to improve my quilting skills, I've taken classes, watched videos and accumulated many books and I refer to them constantly. I've recently added Easy and Fun Free-Motion Quilting - Frames, Fillers, Hundreds of Ideas by Eva A. Larkin to my library, thanks to the generosity of Martingale. This is a great book with such a simple idea: fill in specific design areas with a stipple stitch. As Martingale describes it: 

"Turn stippling and simple lines into fabulous designs! By focusing on only one block or area at a time--rather than the whole quilt at once--Eva A. Larkin makes it easy to create eye-catching free-motion quilting." 

I can't believe that I haven't seen this concept before. While I find it difficult to master some free-motion designs, I can stipple, so this idea really appeals to me. As Eva explains, "My belief has always been that a good quilting design doesn't have to be complicated or intricate to be interesting and effective." I definitely agree with her philosophy.

With this technique Eva uses several different frame shapes and then fills in the "empty" areas with the stipple quilting. You can choose to do the interior of the frame or the exterior corners, or... there are many possibilities. 
Photo courtesy of Martingale
 I love the look this gives the quilting - almost like a filigree. 
Photo courtesy of Martingale
Eva provides lots of general information about machine quilting, everything from how to set up your sewing area for quilting, tackling thread tension issues and even how to choose designs appropriate for your particular quilt. She takes you through the components of a stipple stitch to show you how to achieve that perfect "stipple" look.
I like how Eva takes you step by step through this technique with great diagrams and explanations. 
I can see lots of possibilities for this type of quilting and can't wait to try it out on some of my existing quilt tops. This would also work well on a wholecloth or trapunto quilt.
I would recommend adding this book to your library if you need a good reference book on free-motion quilting.


Monday, October 8, 2012

Happy Thanksgiving - and pumpkins too

Hi everyone:

Happy Thanksgiving to all my Canadian readers! I hope you're enjoying a wonderful day with family and friends. 

This week-end has been a work one for our family as we recently had new windows installed in our house and my husband spent two days priming and painting the trim (aluminum clad wood windows). They look great and make such a difference compared to the original house windows that were replaced. 
Dining room window all taped up and ready to be painted
I like the funky tape colours!
So, instead of quilting this week-end, I spent my time washing floors and furniture, dusting and doing laundry - okay, I was supervising the kids doing most of the heavy work, but still... You wouldn't think that the installation of a few windows would cause there to be drywall dust throughout the house, but it did, so heavy cleaning was involved after the installers left. I guess my spring cleaning was done in the fall instead!
Dining room window all painted and curtains re-installed
Now that the house in back in shape, I'm continuing to work on my Perky Pumpkin table runner. I decided to add some hand embroidery to up just to spice it up. Actually, I didn't want to have to machine finish the appliqué edges, so I decided to do some hand embroidery to keep them down. 

I like that the embroidery has a two-fold function - to fasten the appliqués to the background and to act as an embellishment. 
Pumpkin #1 completed with a long running stitch
Pumpkin #2 completed with a cross stitch
I still have to finish up the last pumpkin and then it will be ready to quilt. 

One more pumpkin to go - and then the leaves
How did you spend your Thanksgiving week-end? I hope you didn't each too much turkey or pumpkin pie :)


Thursday, October 4, 2012

My Favourite Fusible Webs

Hi everyone:
Pumpkin appliqués done with Shades Soft Fuse
In my last post I showed you the Perky Pumpkins tablerunner project that I was working on. While I was fusing down the appliqués, I started thinking about the various types of paper-backed fusible web that were available to use in these types of projects. There are many different brands of fusible web and they all have their uses, depending on what you are trying to accomplish. Let's take a look at a few of my favourites. 
My default fusible web product is 805 Wonder-Under by Pellon
Traced appliqué shapes on Wonder-Under
It's inexpensive, easy to use and does the job for me. I use it for simple shapes and often window it (cutting out the centre portion) on larger shapes or if I am going to be doing some layering. It can be a bit stiff, especially if you are layering, so I wouldn't recommend it for quilts or wearable projects. I use it on non-wearable items, such as tablerunners or wall hangings, so the stiffness that sometimes results isn't really a concern for me. This is how Pellon describes this product:

"The original paper backed fusible web.  Regular weight. Machine stitchable, fuses easily in seconds. Fabric maintains a soft hand after fusing. Great for apparel, home decor and craft projects. Fuse detail areas including hems in denim, facings, applique, cut-work and monogramming. Bonds fabric to fabric or any porous surface.Example: wood, cardboard and much more!"


If I ever need to bond my fabric to a wood background, I'll know what product to use!
I used Wonder-Under for Hoot-mon! and
the appliqués were quite stiff
If I want a product that is lighter and less stiff, I go to my second favourite product, Shades Soft Fuse.

This product is just as the name says - it remains soft and you fuse it down. Unlike most fusible web products, Shades Soft Fuse is 37" wide. This product was developed by Stacy Michell of Shades Textiles.Co., who describes Shades Soft Fuse as "paperbacked fusible web for machine appliqué or hand appliqué quilts". 

Image courtesy of www.shadessoftfuse.com
I usually purchase it at my local quilt shop where they already cut it into 1 metre lengths. I really like the light hand that the fabrics retain after fusing and this is a perfect choice for layering appliqué shapes. It fuses quickly - almost instantaneously - so you don't have to hold the iron on it for very long. The only downside of this product is the price - over $14.00 the last time I purchased a metre of it. Since Wonder-Under is about $5.00 a metre, it's still a better price, even if it is only 17" in width. 
I used Shades Soft Fuse for the pumpkins, stems and leaves
The other product that I sometimes use is Steam-a-Seam 2. There is often confusion about this product because there are actually four similar products available from The Warm Company (Steam-a-Seam, Lite Steam-a-Seam, Steam-a-Seam 2, Lite Steam-a-Seam 2). You need to understand the differences in these products before you decide which you'd like to use. As The Warm Company explains on their website:

"The original, Steam-A-Seam Sticky Back, has the pressure sensitive adhesive (the "stick") on one side which allows for a temporary hold to the appliqué material. It shifts easily on the second material allowing you to quickly reposition your appliqué pieces until pressed with an iron for a permanent bond. Once fused the bond is the same as Steam-A-Seam 2.


Steam-A-Seam 2 Double Stick has the pressure sensitive on both sides which allows for a temporary hold to both the appliqué material and the background material. You can hold your project vertically and the appliqué pieces stay in place and are still repositionable until fused with an iron. Before fusing, tack your project to a wall or try on a garment to check appliqué placement. You're able to reposition pieces while you're wearing them. Once fused the bond is the same as the original Steam-A-Seam."


Image courtesy of www.warmcompany.com
I like to use Steam-a-Seam 2 as you can reposition the appliqué shapes and temporarily "fuse" them down by pressing them onto the background with your hand. They stay in place and you can move them around until you are satisfied with the arrangement before you fuse them down with the iron. I find the Steam-a-Seam products add about the same level of stiffness to the appliqué shapes as Wonder-Under. 

So those are my top 3 fusible web products that I use. There are many more available in your local quilt shop and on-line, so if you aren't totally happy with the product that you're currently using, why not try out some of the other choices?

What type of fusible web product do you use and why? Leave me a comment and let me know.

Monday, October 1, 2012

Fall into Perky Pumpkins

Hi everyone:

Here we are in October already and it still feels like summer to me. This could be because the weather was warmer in September than it was in June - and there was a lot less rain too! But, I must accept the fact that the warm weather will soon be cooling and those first few flakes of white stuff (I hesitate to use the "s" word) will start to fall. 

In Calgary we don't get the vibrant colours in our foliage as those in the east do. The leaves do change, but they're usually yellow and brown, not the beautiful reds and oranges that I remember from my childhood. I can, however, enjoy the fall colours in my fabrics. 

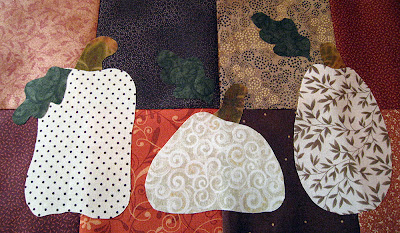
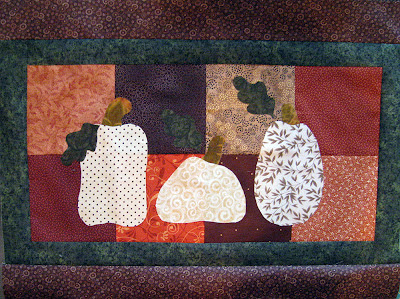
This week-end I worked on a kit, Perky Pumpkins, that I purchased from The Quilt Patch a few years back. It's a simple fusible web appliqué pillow project with three pumpkins, but you know me, I had to add a bit to it. Rather than following the instructions and create a pillow, I decided to add a bit more fabric to it and make it into a tablerunner. It's simple to change up a project by just adding a little bit more here and there. Here's how the process went:

Here are the background fabrics for the pillow front - oranges and browns
The bright orange fabric was also included for the pillow backing, but I had other plans for it. More about this later in this post.
Pumpkins and stems fused down 
I liked the fact that the pumpkins were cream fabrics, rather than the usual orange. Of course orange would not have shown up on the orange/brown background fabrics. 

Pumpkins, stems and leaves all fused down
So this would be the finished top (except for stitching down the appliqué, of course), but since I wanted a tablerunner, it needed to be a bit bigger. As I didn't have any more of the kit fabrics, I started rooting through my stash to come up with some border fabrics. I found a nice green that I thought would be a good choice for border #1.
Border #1 attached
I liked the green border and wanted to add another border to make it even larger. So I found some brown fabric.
Brown fabric for border #2
You'll notice that the edges of these fabric strips are pinked - cut with pinking shears, not pink in colour :) This is because these pieces of fabric came from a bag of cut fabric pieces that I bought at Hamels Fabrics. There were several different coordinating fabrics in various sizes and these strips just happened to be wide enough to be border #2. I had to piece them together - yes, they were quite short - but with a mitered seam, you really can't see where they are stitched together. Here's how the pillow tablerunner looked after adding border #2.
Border #2 added
Now remember that piece of orange fabric that was included as the backing in the kit? Well, I thought it would be perfect for border #3, but there was just a small problem. Yup, not enough to go around all sides of the project. Well, not really a problem since I was pleased with the width of the tablerunner and just wanted to make it a bit longer. I decided to add the orange fabric to the sides of the tablerunner only. I then added more of the brown fabric to the sides as well. It looked like this:
Orange and brown side borders added
Well, that's a little different than it was supposed to be! I thought about adding some more little pumpkins in the borders, but decided that I would add some leaf buttons and do some hand embroidery on it to give it a bit more presence. Here's another shot of the top.
Almost ready for the table
I've already cut the backing and batting for the project and will avoid binding by using the pillowcase method to finish it off. Some hand embroidery on the appliqué pieces will keep them in place and then I just need to decide on how to quilt this baby and it'll be ready for the table for Thanksgiving - which is next week-end for us Canadians.

Are you working on any fall or Halloween projects? Leave me a comment or send me an email with photos of your latest creation.